Running your practice 7 min read
How to promote yourself on social media as a professional
Clients compare several professionals before they book. Six M-TIME tools that take people from a post, a story or a QR code straight to your booking page.
Your working day
When bookings are in one place
- Confirmed booking
- Available slot
- Booking request
A client is looking for a nail technician near home. She opens several Instagram profiles, scrolls through the work and looks for prices. She books with the professional whose price and free slot she finds first.
Many professionals work in the same city, and their feeds often look alike. So clients also compare convenience: is the price visible, is there a free slot, can they book without messaging? If they have to ask for the price in a direct message, some of them move on to another profile. For you, that means empty hours in the calendar and lost income.
Being on social media is not enough to be chosen. Every post and every story has to lead to a booking. That is the idea behind M-TIME: it helps professionals compete for clients’ attention. M-TIME takes the services, prices, schedule and reviews from your profile and turns them into social media materials. Each one opens your booking page.
Below are six tools, from a link in your bio to a booking button on your own website.
I post my work every day, but new clients ask “how much is it?” and disappear after I reply.
Add your booking link to your bio
The link is the basis for every other tool. It opens your booking page with your services, prices and available times. The client chooses a service and a time and sends a request, which you then confirm.
You can copy the link in the M-TIME settings. On the “Profile Tools” page, find “Share profile and QR”, tap “Show QR code”, then “Copy”.
Add the link to your Instagram, TikTok or Facebook bio and to your Telegram channel description. Send it whenever someone asks about prices: they can see the price list and free days for themselves. To cut down on messages after a request, read “How to keep client bookings organised”.
Do this as soon as your profile is set up.
Publish a post made from your profile
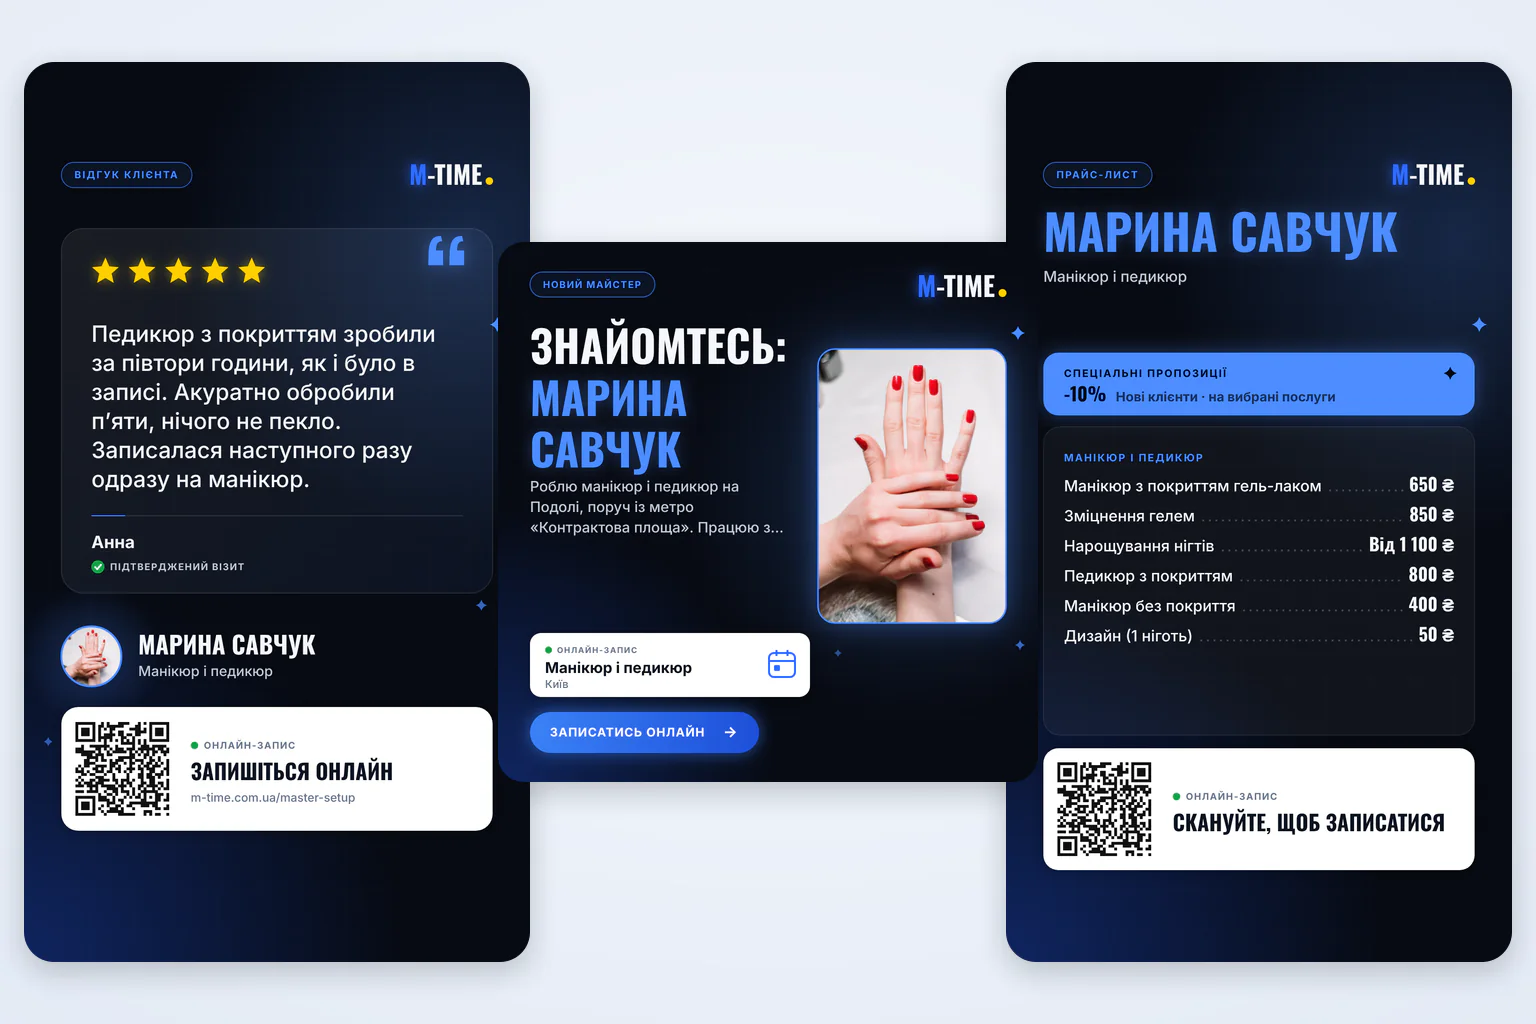
You do not need a designer to announce online booking. M-TIME builds a square image from your profile: your photo, name, specialty and a call to book online.
In the same “Share profile and QR” card, tap “Share my profile”. The “Your social post” window opens. On the “Image” tab, choose one of five colour styles. The “Caption” tab already has a caption with your booking link.
On a phone, “Share image” opens the share menu, where you can choose Instagram, TikTok, Facebook or X. On a computer, use “Copy image” and “Copy caption”, then paste them into a new post. The “Get Instagram image” button on the photo of your public page opens the same window.
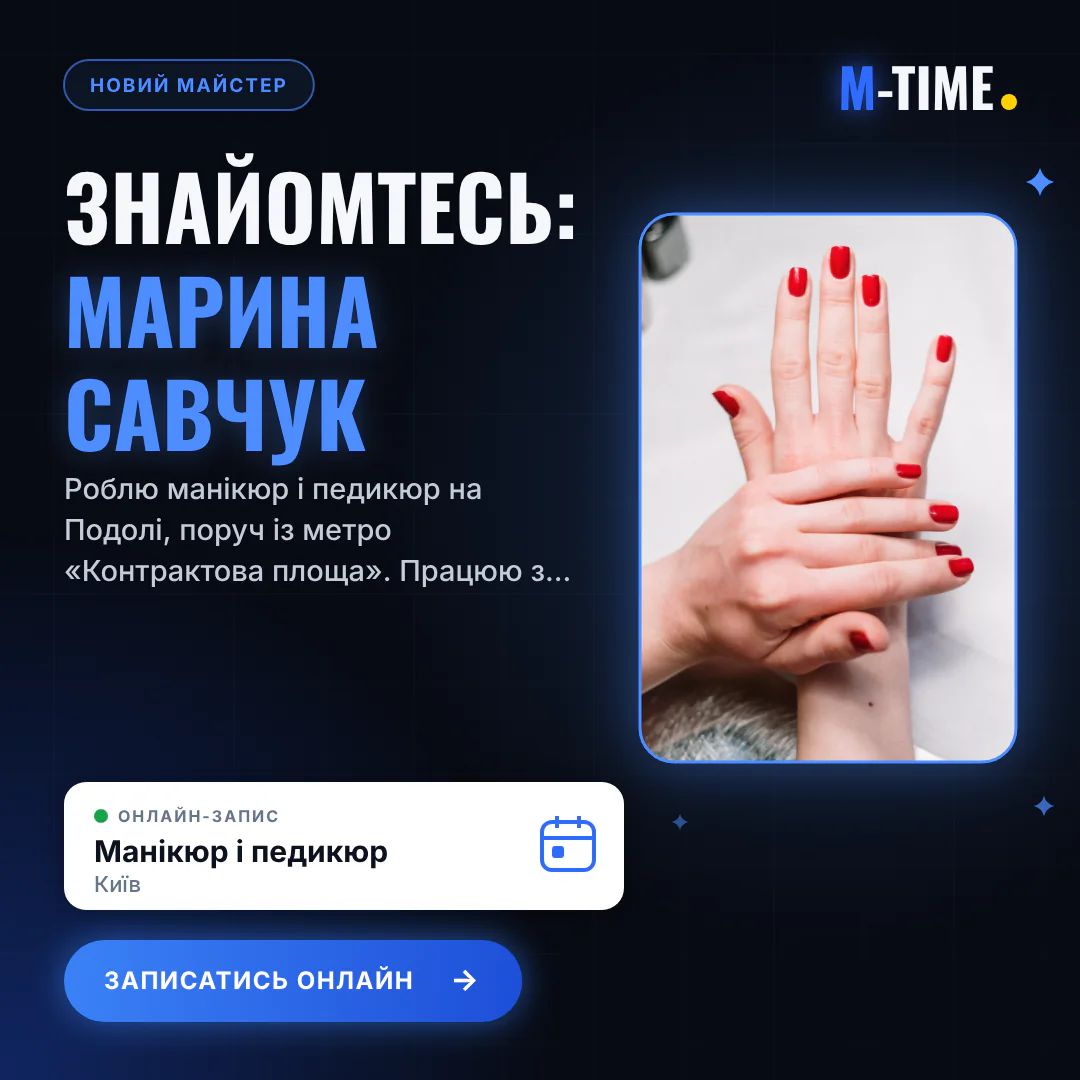
The social post M-TIME created for a demo manicurist profile, in Ukrainian. Photo: Anna Avilova, Pexels.
Publish the post when you open online booking, and again after you change your photo or specialty. Your followers will learn that they can book with you without a phone call.
Share your price list in a story
Price is the most common question, so show it before the client has to ask. M-TIME lays out your services and prices in a vertical story image. If you run discounts, they appear under “Special offers”. At the bottom, a QR code opens your booking page.
Tap “Share price list” in the “Share profile and QR” card or on the services page in your settings. The “Your price list” window has “Share” and “Download” buttons. After a download, M-TIME copies your booking link so you can add it to the story. The price list needs at least one service on a public profile.
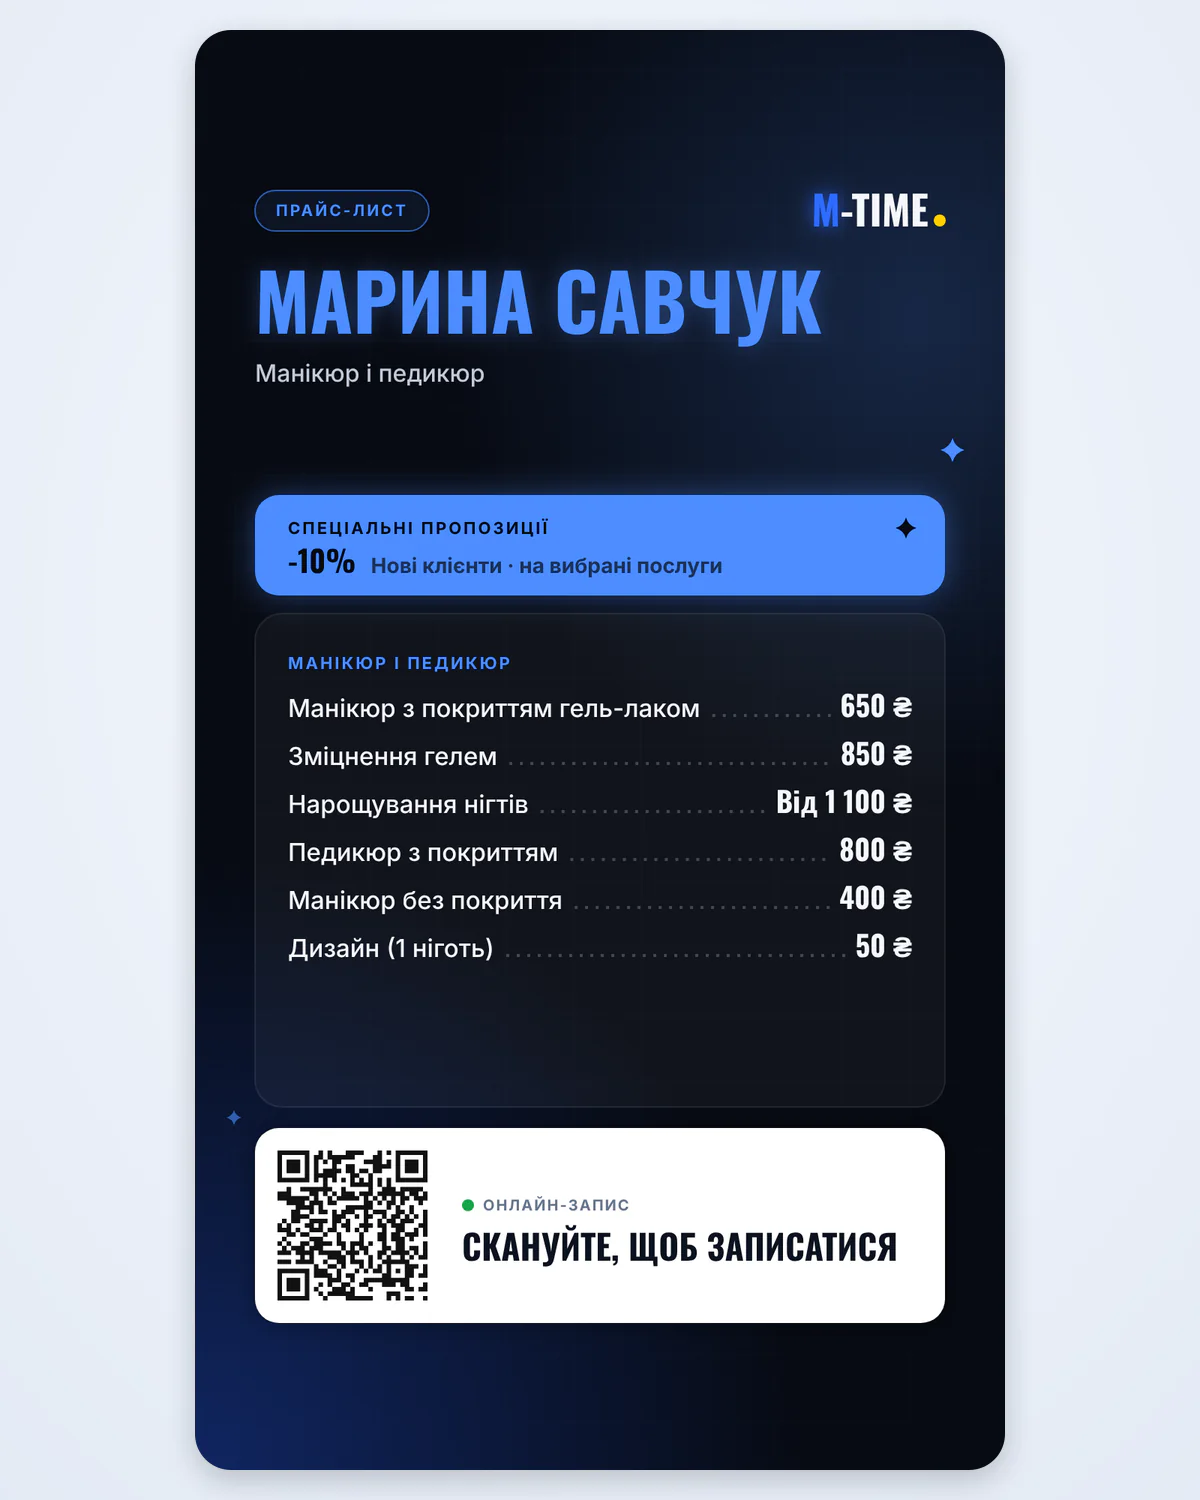
The price list story M-TIME created for a demo profile, in Ukrainian. The QR code in the illustration opens the M-TIME sign-up page for professionals.
Update the story when you change prices, add a service or start a discount. Add it to your Instagram Highlights so the price list stays on your profile after the story expires.
Show a client review in a story
New clients ask if I have reviews. Not everyone trusts screenshots of messages.
A new client does not know you yet, so they look for the opinion of people who have already been to you. In M-TIME, a client can review you only after a completed visit, and only once per profile. That review comes from someone who actually had an appointment with you.
Open your public page and find the “Reply to reviews” section. Next to a five-star review with text, there is a “Share the review as a story” button. M-TIME creates an image with the review text, a “Verified visit” label and a booking QR code.
If you prefer not to show the client’s name, turn on “Hide the customer’s name”. The image will then say “Customer” instead.
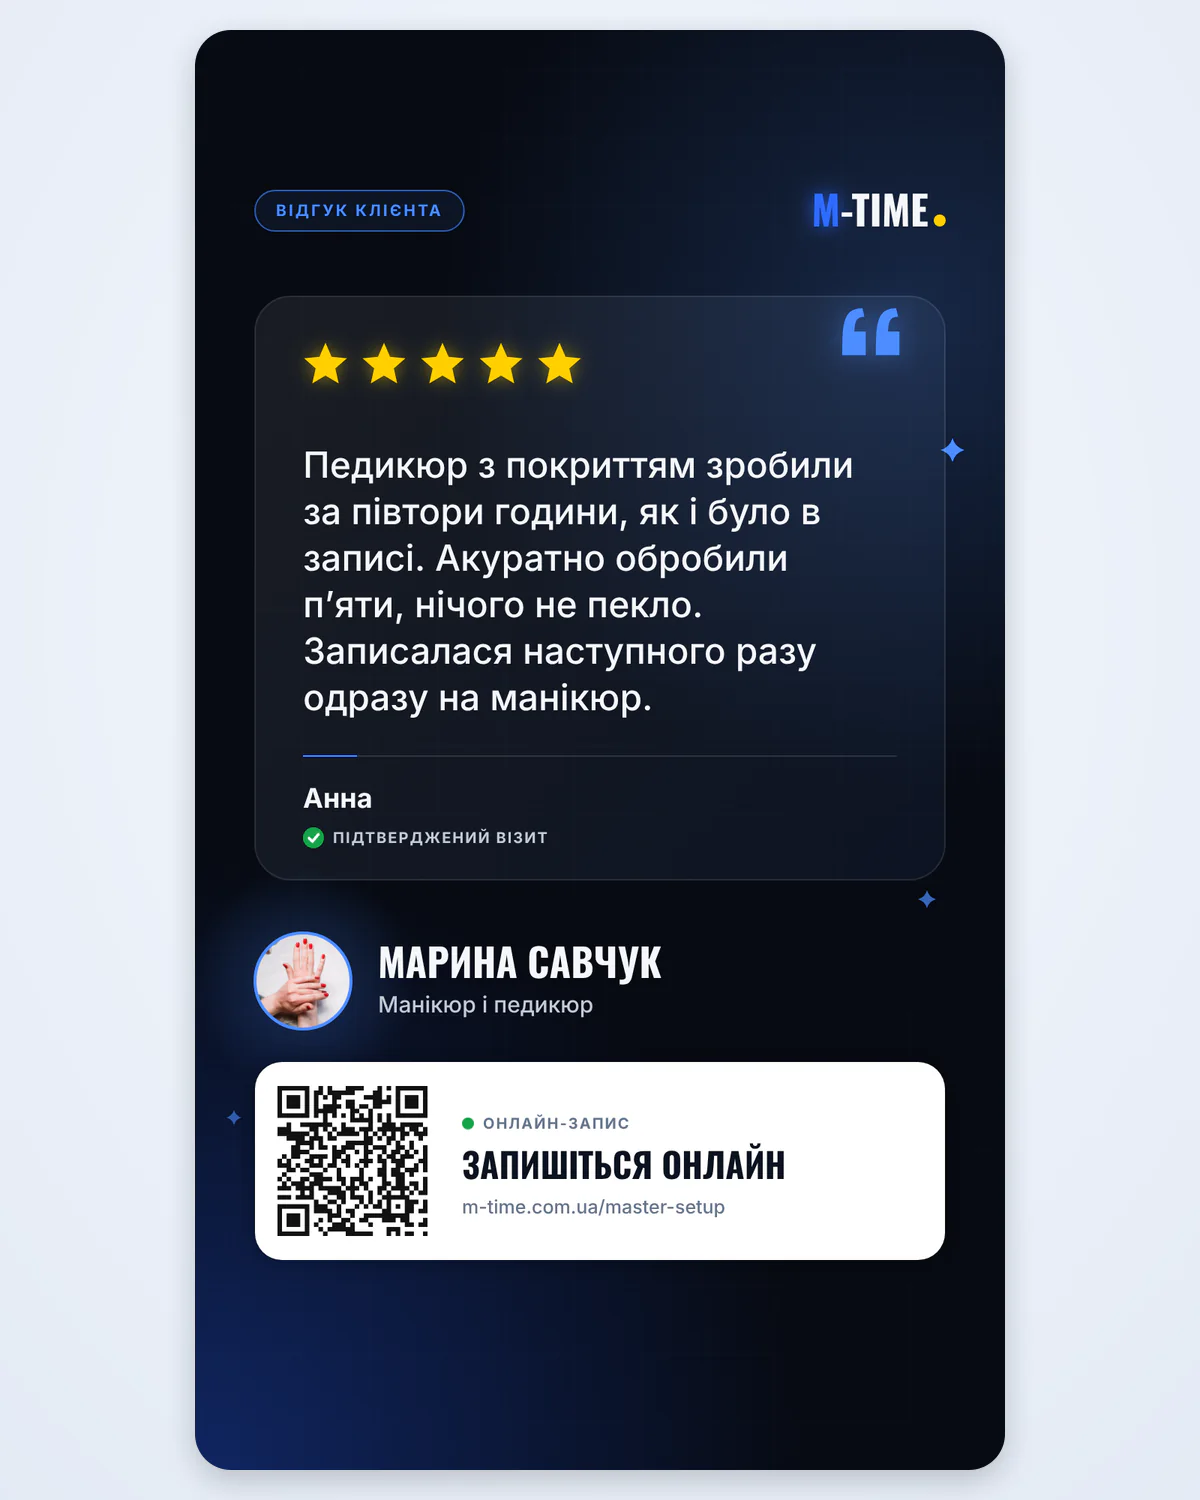
The review story M-TIME created for a demo profile, in Ukrainian. The review is synthetic.
Share a review on the day it arrives, and add these stories to your Highlights. New visitors to your profile will see them before they send their first message.
Put a QR code where clients wait
A client asks about my next free day on her way out, and my hands are covered in dye.
Not every client comes from social media. A QR code lets someone book while they are in your chair or waiting at reception.
You will find your code in the settings: “Show QR code” opens the “Booking QR code” window, which leads to your booking page. Show it at the end of a visit, and the client can scan it and choose a date. The same QR code appears on the price list and review stories.
Salons also get a QR poster. In the company settings, on the “Basic info” page, tap “Create poster”. M-TIME prepares an A4 poster with the professionals at that location, a QR code and three steps: “Choose a service”, “Choose your master” and “Pick a free time”. If you have several locations, choose one. You can download the poster as a PDF or PNG. Print it at 100% scale so the code stays sharp.
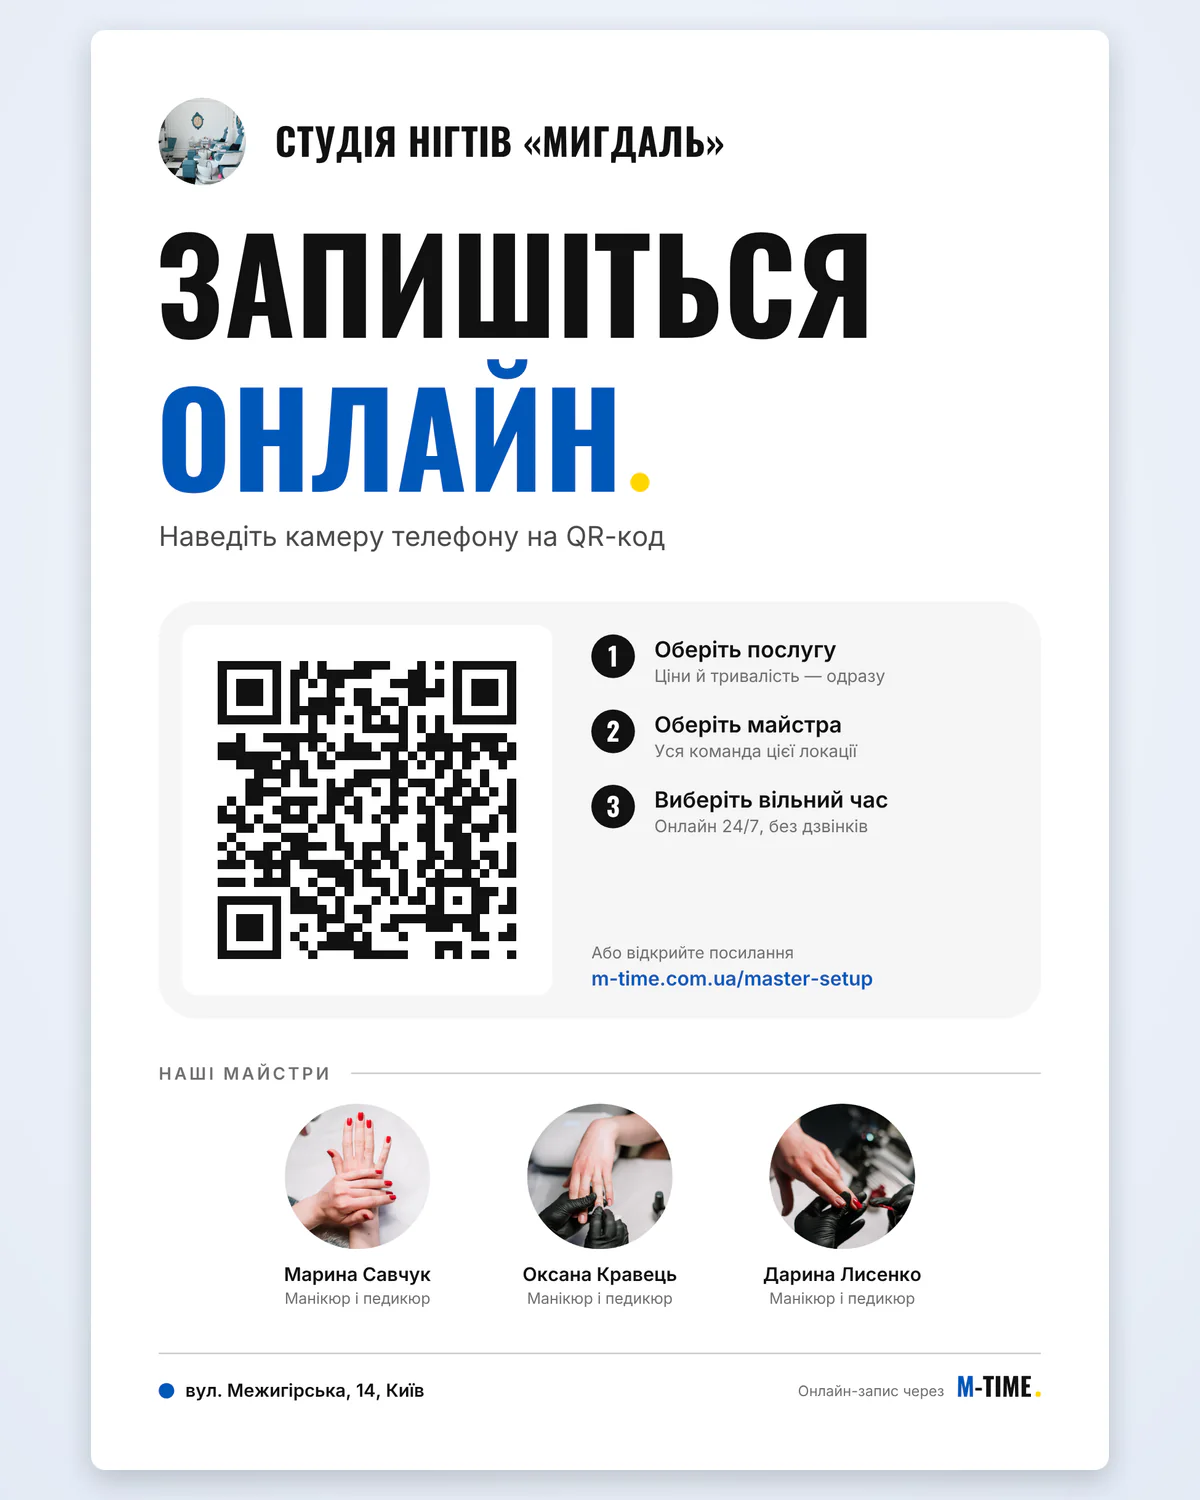
The QR poster M-TIME created for a demo studio, in Ukrainian. The QR code in the illustration opens the M-TIME sign-up page for professionals.
Put the poster next to a mirror, at reception or in the waiting area, where clients have a few free minutes and a phone in hand.
Add a booking button to your website
If you have a website or a landing page, add a “Book now” button to it. In the settings, find “Get booking button widget” and tap “Get widget”. The “Booking button widget” window has a preview and ready-made HTML code.
Tap “Copy code” and paste it into an HTML or custom code block on your site. The button is a plain link without scripts. It opens your M-TIME booking page in a new tab, so you do not have to update prices and available times on your website separately.
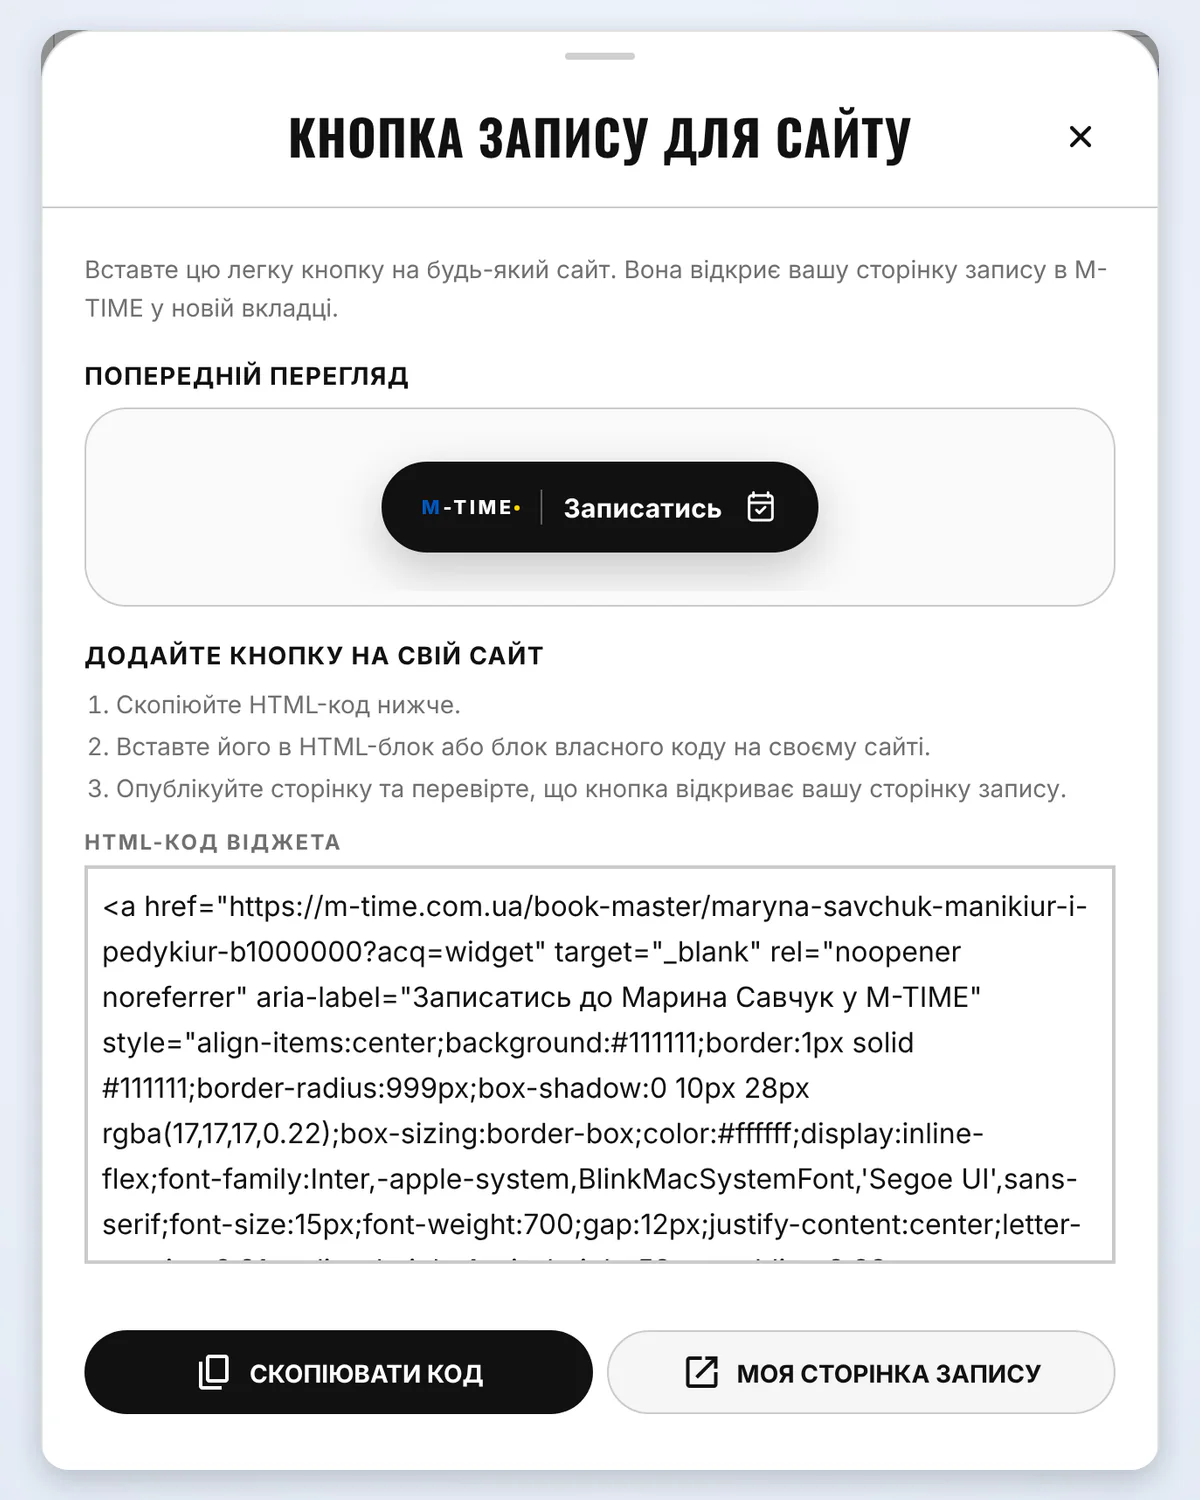
The booking button window in the settings of a demo profile, shown in Ukrainian.
Place the button on your home page and next to your prices, where a visitor decides whether to book.
What changes when every channel leads to a booking
All six tools lead to the same booking page. M-TIME builds new images from your profile data, and the QR code and button open a page where prices and available times are always up to date.
M-TIME prepares the social media materials, so you can post more often. Clients see prices, reviews written after visits and available times without messaging you, and their booking requests wait for you in the app. Nobody has to ask for the price, so fewer people move on to another profile. The time you spent answering direct messages goes back to your clients.
Start with the link in your bio, and post a price list story this week. When your first five-star review arrives, share that too.
How a client books through that link, and what else the profile gives you, is on the page “Online booking for professionals”.
Don’t have an M-TIME profile yet? Go to m-time.com.ua/master-setup. Choose your category, add your services and working hours, then sign up. You will get a booking link, the starting point for every tool in this article.
The remarks illustrate work situations; they are not customer testimonials. Illustrations are images M-TIME creates for a demo profile.
Start with one service
Add its details, open a time for bookings and share the link with a client.
Set up your professional profile